Friday, December 27, 2013

Marching Fort corner (part 4)

Finally making some progress again after the holy-days. Here are the BBQ skewer stockade walls right after cutting and pointing them. They are just stuck in for fit testing.


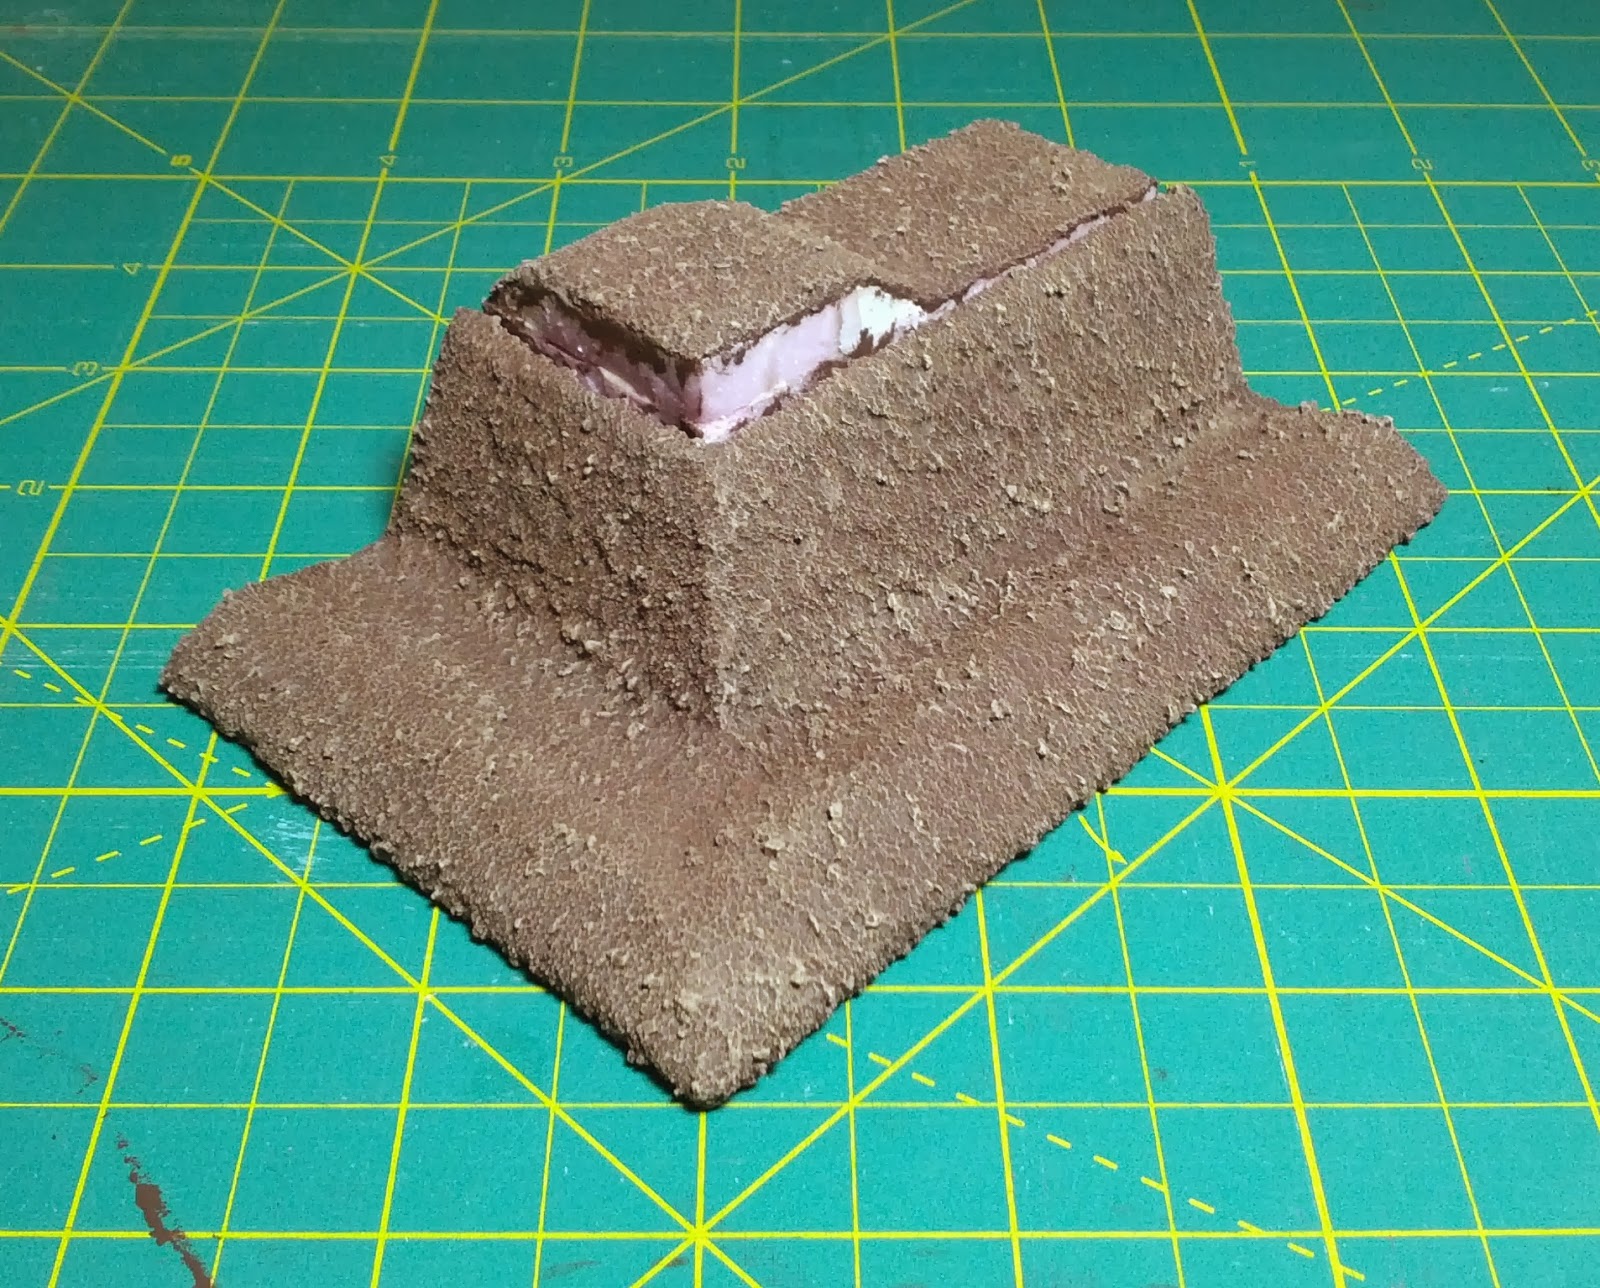
Here they are glued into the base. They were first glued to the cross-members and then dry-brushed various shades of grey and brown. I used shorter half-rounds for the cross-members this time. On the last wall section a single, round, cross-member went all the way across. That's one tall tree! Plus, you know my motto: you can't change enough things. I also hit some of the larger stones on the terrain with some greys.


I had an issue when I got started this evening. Red, gold, and green glitter on my model. It seems a Christmas card ended up on the what doubles as my work space and before I knew it was everywhere. Damn stuff a nuisance if you ask me. Perils of crafting during the holidays I suppose...

Getting close to finishing this one up. Next up, some spackle and paint on the ends, a coat of matte varnish, some clear varnish to make the ditch look wet, and then some random foliage bits. Then onto the next section. Maybe the gate? I guess at some point I'll have to revisit my first wall section and make it look more like this one.

Wednesday, December 25, 2013

Merry Christmas & Happy New Year

Not much progress on the marching fort with all the holiday cheer going around. Here's a pic of some of my Christmas swag though. Birthday's just around the corner, so more goodies to come...


Wednesday, December 18, 2013

Marching Fort corner (part 3)

A few quick snaps of the work in progress and a comparison with the less sandy basing technique. I also switched up the color palate and made it less "warm." Because you know, you can never change enough things...


 Guess I better get started sharpening skewers...

Wednesday, December 11, 2013

Marching Fort corner (part 2)

Long time no update. I've been making slow progress, but was laid low for a few days with yet another cold (number three this season for those playing along at home).

I decided to forgo a fancy corner tower or crow's nest and simply raise the level of the dirt berm and stockade at the corner of the fort. I did this by adding bit more pink foam there:


I wasn't super happy with how regular the dirt surface of the last section turned out. I had used a coffee stirrer to apply the Vallejo White Pumice last time. This time I decided to get some more texture by using a paint brush (and a very crappy one at that):


When experimenting, its important to change as many things as possible in one go, that way you'll never know what worked. With that flawed reasoning to motivate me, I decided to also change the way I painted and sealed the terrain. Last time (after struggling to adequately cover the pumice) I ended up using a mix of PVA, Burnt Umber craft paint, and playground sand. 

For this attempt, I used the same three materials, but applied them in sequence. First the PVA, then a mix of playground sand and decorative sand (yet another variable!) on the wet glue:


And then a coat of the Burnt Umber craft paint. This again proved problematic. I ended up having to mix it with PVA to get it to cover some of the deeper dimples in my roughly textured surface.


Next up my favorite part, dry brushing...

Friday, November 29, 2013

Marching Fort corner (part 1)

I was unsatisfied with cutting the the pink foam with the coping saw, so I went by the hardware store near work during lunch and scored one of these beauties. Night and day, hands-down a better tool for the job.

Last night I did some sketching and tonight I cut the foam for a corner section. I was amazed at how much more precise the cuts were. I was ready to build Troy out of pink foam!  =]


The cut below was a little rough. Not sure if my technique was off or if there is actually a grain to this stuff?


I guess a square corner section might make more sense, but the only big plywood bases I had were rectangular. Meh... 

Thursday, November 28, 2013

Marching Fort wall section (part 9)

Well, it's finally finished! Sorry for the lack of WIP shots, but I've been working in dribs and drabs and before I knew it it was done.


As I mentioned, I decided to make the ditch look wet. This is just some Humbrol enamel gloss varnish over a coat of acrylic matte varnish over the whole shooting match.


I flocked with some Army Painter field grass and then added some various tufts & flowers.


Some kitty litter rocks were added during one the previous painting sessions. These were dry-brushed with a couple different craft store acrylic grays. In hindsight I probably should have added them in more than just the ditch as the concentration of stones there looks a bit unnatural. Next time.


Here you can (barely) make out the work I did to mount the log stakes in the berm. As you recall they were separate for painting. I put some white glue down into the gap and them wiggled the fence in. Once dry, I added a bit of spackling on the sides to cover the gaps on the sides. After a day, I sanded and then painted over the spackling with more craft store acrylic burnt umber. 


 Not much to see on the backside. Just a few dry looking tufts. I debated adding some flocking here too, but decided that with all the marching going on the the marching fort, no grass would be able to take root!  =]

Now I have a decision to make. Carry on with more sections or noodle with trying a waddle fence. Stay tuned...


Monday, November 25, 2013

Inspiration (part 10)

I've stumbled upon a great series of blog posts about Late Roman Britain written by one Barry Jacobsen. A good read with lots of pictures (obviously from other sources). Here's a link to the first part:


THE AGE OF ARTHUR: PART ONE


Yes, I've also noted that with all this "Inspiration" I should be getting more done. Maybe I should re-title these posts "Distraction!"  =]

Sunday, November 24, 2013

Inspiration (part 9)

I just finished another great read. This is one is also about King Arthur.  Although the prose is quite modern-sounding it is incredibly clever. Many a passage had me laughing out loud or sharing a line or two with my wife in the chair next to me. Not to say it's a comedy of course, but just very cleverly written.


Perhaps some of the most moving chapters were those Arthur spent among the "faerie folk" (Prydn as they call themselves). The way Godwin describes the gritty, intensely spiritual, bronze-age nomads is really a joy to read. Like Rosemary Sutcliff, this author uses the vernacular of the natives (in this case the Prydn) in his dialogue and this really helps set the tone. Good stuff!

Sunday, November 17, 2013

Marching Fort wall section (part 8)

Well, I think I'm finished the dry brushing for the stockade. My first attempts came out too uniform to look like random logs strapped together, so in the end I went with more of a stippling technique.


A couple of close-ups:


Here are a couple of shots with the stockade in the earth berm:


Overall I'm pretty happy. It seems a bit anachronistic though. It looks kind of like I've got a freshly made earth berm and some ancient logs. I may go back and darken the earth and lighten the logs. We'll see...

Next up some matte varnish and then static grass and a few tufts.

Wednesday, November 13, 2013

Marching Fort wall section (part 7)

God, I love the sheer mindlessness of dry-brushing. And the Vallejo pumice painted up a treat.


I could've kept at it all night but forced myself to stop after four color variants.


Here it is with my three log tests. I gotta say, I'm leaning toward the one on the far right. The middle one just seems way too dark and the first just gets lost on the brown dirt mound.


You may have noticed a darker streak at the base of the wall. I'm thinking of making it look a bit wet there.


Tuesday, November 12, 2013

Marching Fort wall section (part 6)

Well, I think I finally licked the issue with white spots showing through the porous pumice. I made a goop of water, PVA, burnt umber craft paint, and a bit of playground sand (just for laughs).


And here it is with a barely noticeable dry-brush of "spice brown." More dry-brushing to come, but it's beer-o-clock here...


Here's a shot of various dry-brush techniques for the logs. Brown base, Brown-Black base, and Black base. I'm trying to decide what look to go for. Newly cut logs, ancient logs, or something in between.


I may defer this decision until more of the dry-brushing is done on the base to make sure the fence stands out color-wise.

Not as much progress as I'd hoped, but I was sick again dammit. Twice in two months. I may have to start eating apples again...

Tuesday, November 5, 2013

Marching Fort wall section (part 5)

So I've textures the fence a bit with a wire brush and primed it black. I read somewhere that most tree trunks are grey (not brown), so we'll see how the dry brushing goes. I might to a couple of test "logs" to try out different color palettes.


The ancient Elmer's wood glue was a bit lumpier than I'd hoped. Hopefully it will be less noticeable with some matte varnish.


Priming the White Pumice was a royal pain in the ass! There were a bazillion tiny crevices and craters that were next to impossible to get paint down into. I tried a dilute wash. I tried a full strength, goopy-latex coat. I even made my own "stippler" brush by cutting down a rather stiff, synthetic #1 brush. Each time I looked I would find new, sparkly, white dots twinkling back at me. Argh!!!

Next time I might use a latex paint/PVA mixture for the first pass. Maybe the PVA will provide some gap filling? Or mix the paint in with the pumice first. I'm using cheap craft paint so I'm not too worried about the expense. Or I could just skip the pumice...

Anyone out there had this experience?

Sunday, November 3, 2013

Inspiration (part 7)

I just finished a mammoth book about the British rebels Caradoc and Boudicca called "The Eagle and the Raven" by Pauline Gedge:


The book is a study in contrasts and does an excellent job capturing the juxtaposition of fractious, self-serving British tuatha versus the necessity to unite to throw off the bittersweet yoke of imperial occupation. It captures the flavor of the old gods (and their relationships to the various tuathas) versus the new god. It also explores the dichotomy of sustainable, guerrilla warfare versus the more "honorable" method of head-to-head battle.

I have to admit, some of the reviews are correct in that it takes a while to get going. Like 150 pages or so. Once Rome invades though, the book gets rolling and (for the most part) doesn't stop. It's a bit more psychological than martial, and a more assertive editor could have whittled it down a bit (it's nearly 700 pages), but it's a fascinating take on the period and highly recommended for those interested in the Roman occupation of Britain.

Saturday, November 2, 2013

Marching Fort wall section (part 4)

I'd bought some Vallejo white pumice a while back with the intention of using it for basing. Upon further research, many people find it to be too messy for basing. So I stuck to Gareson's method.

However, I felt like I shouldn't let the pumice go to waste and decided to give it a go on the earth berms of the fort section.


As expected, it was a bit of a nuisance. I used a wet craft stick too apply and it was hard to get it on evenly and without the odd bit poking up like meringue. I'm pretty pleased with the texture though.


Here's the back of it done. Have to admit this side is looking more like a concrete bunker than an earth berm, but hopefully some paint and flocking will sort that out...